Apart and / or Together
Together:
Into companionship or close association. This could be anything identical or two of the same things with a different style next to each other.
Apart:
Separated by a specified distance in time or space. This could be anything which has been cut in half, separated from another like it or part of the object could be missing.
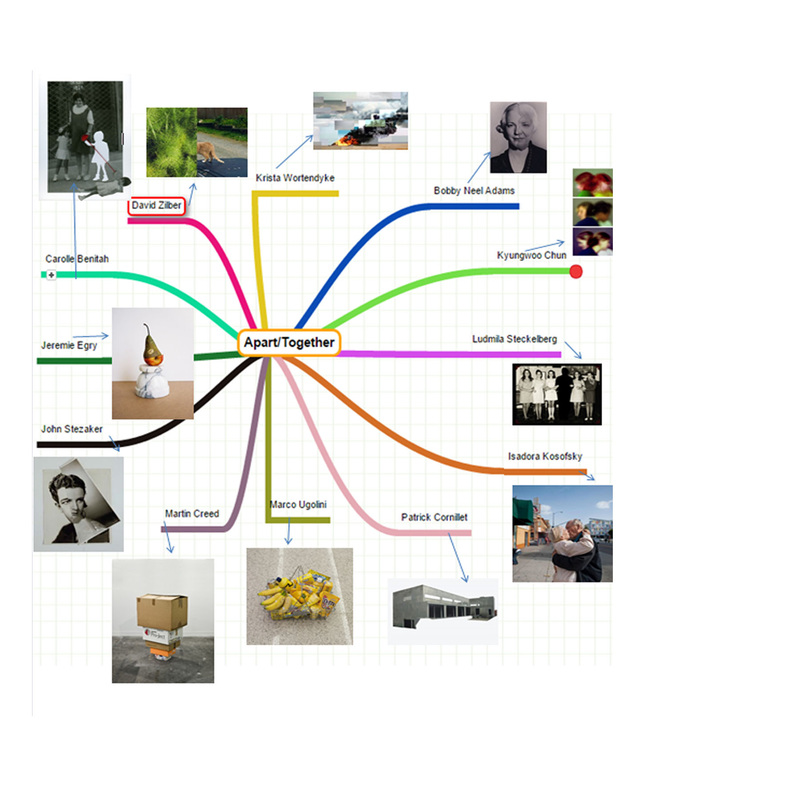
Mind Map for Apart/Together
This mind map shows my favorite photographers relating to the topic of Apart/Together and a picture of their work.
Task 1: Objects
|
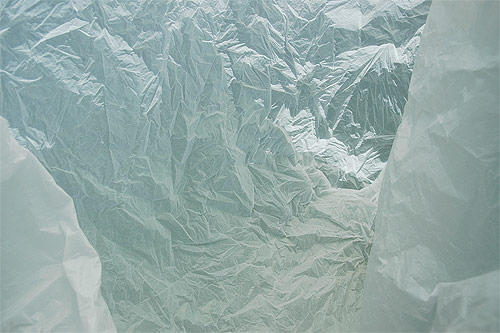
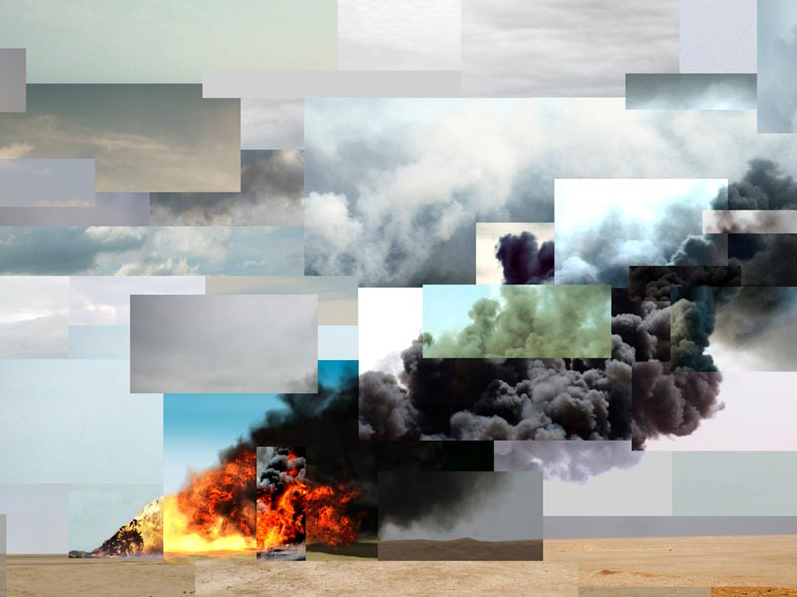
When surfaces are exposed to different types of force there can often be an interesting and intriguing visual outcomes. Francois Delfosse is a photographer that takes photos inside crumpled up, used plastic bags. His work is mostly abstract and resemble a glacier cave in the North of the South Pole.
|
My Response
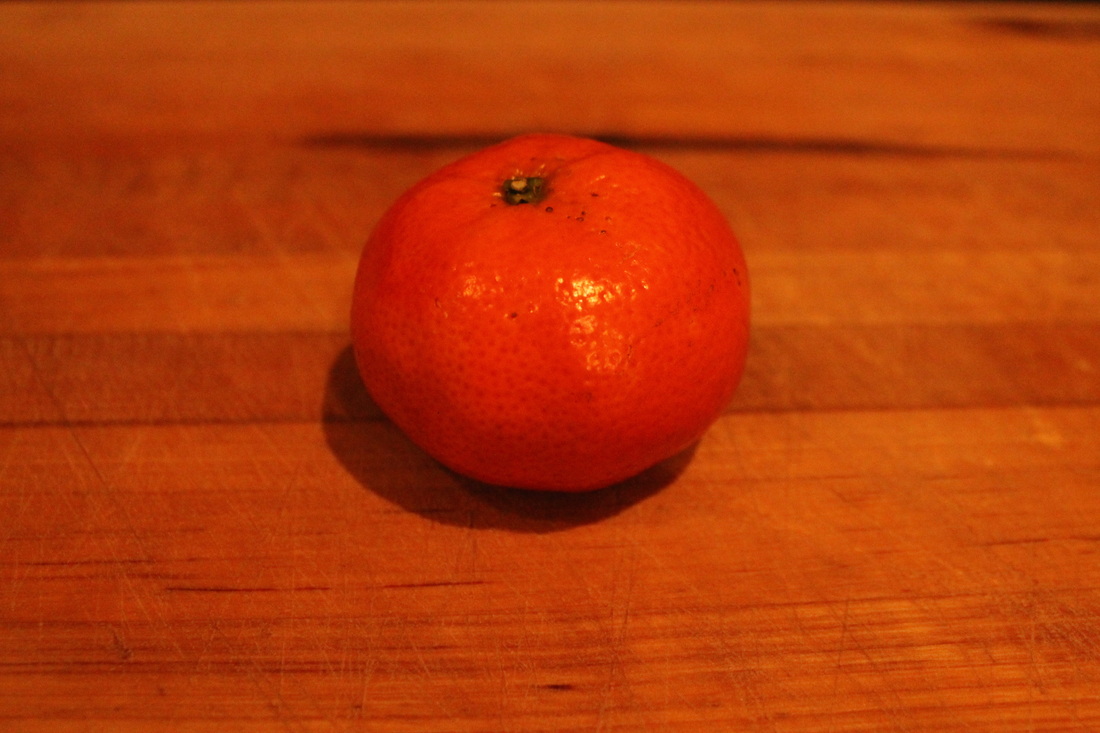
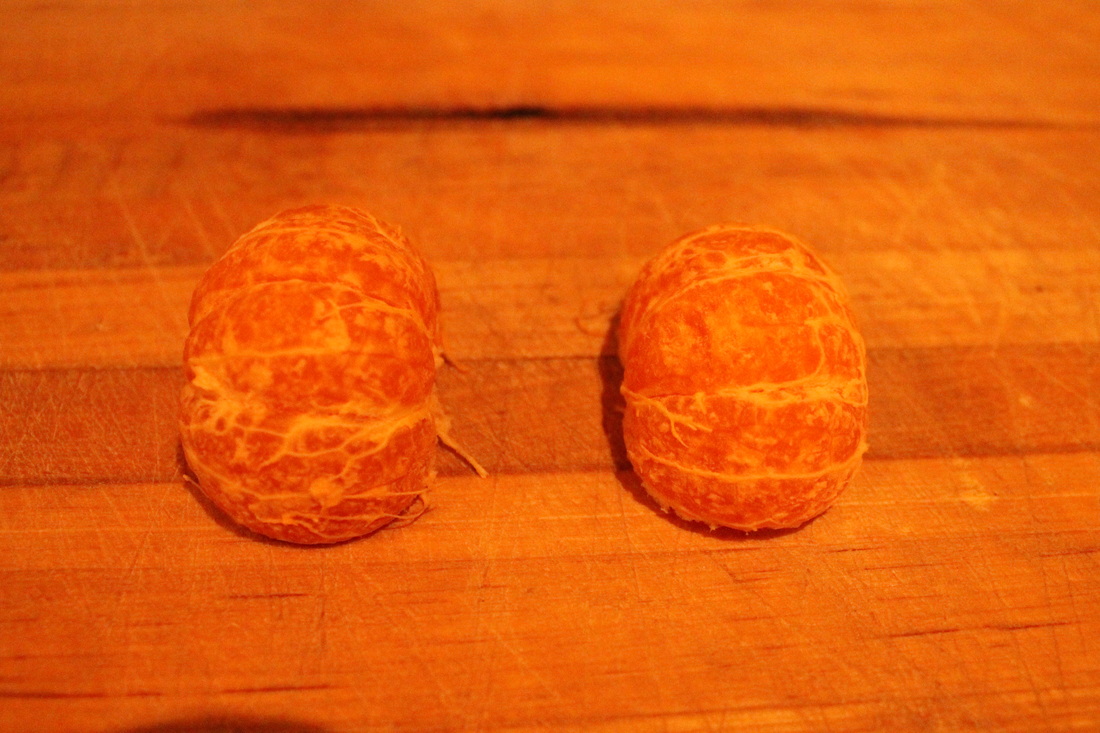
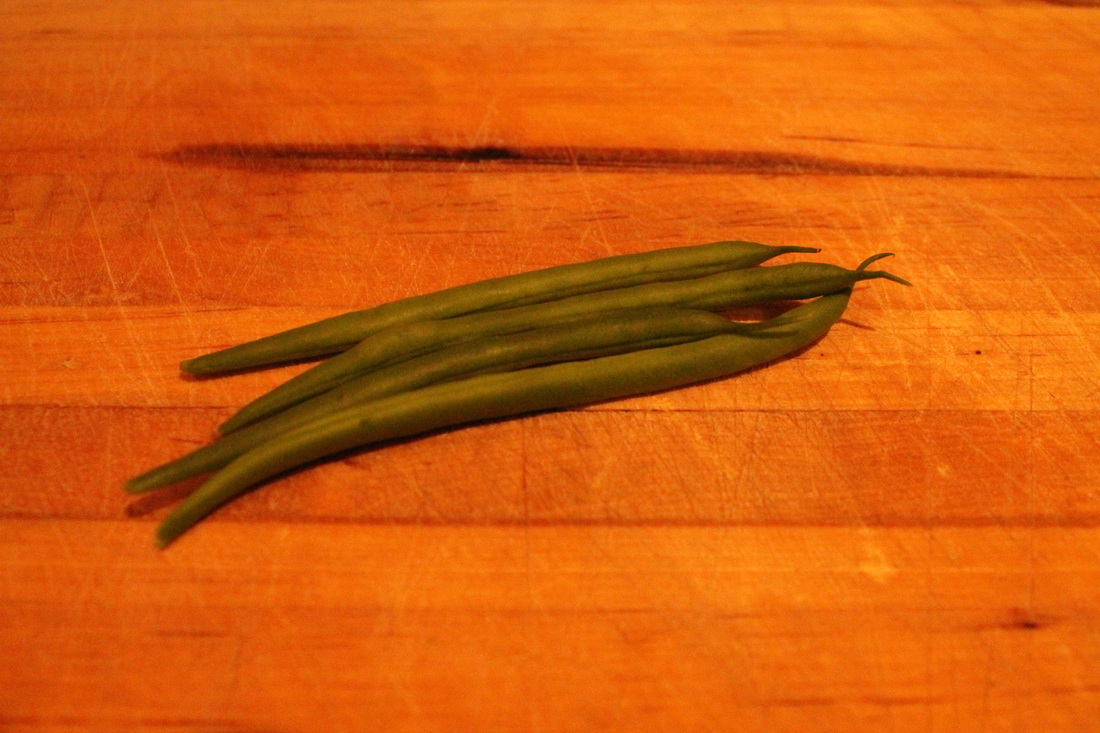
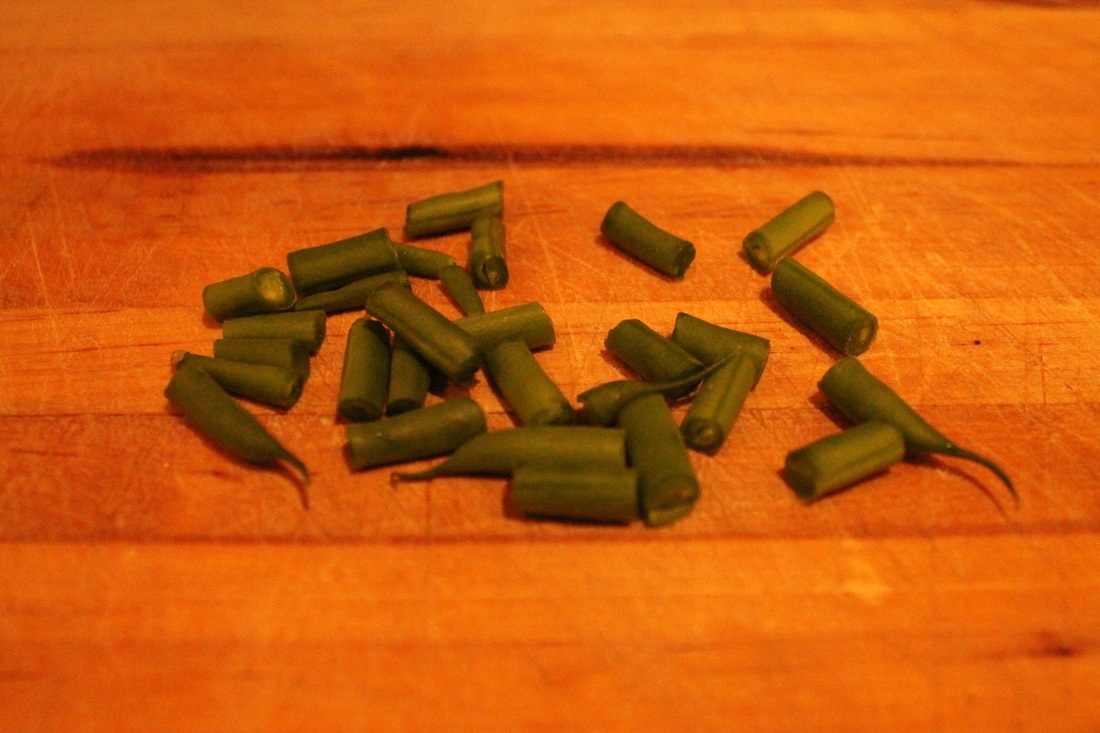
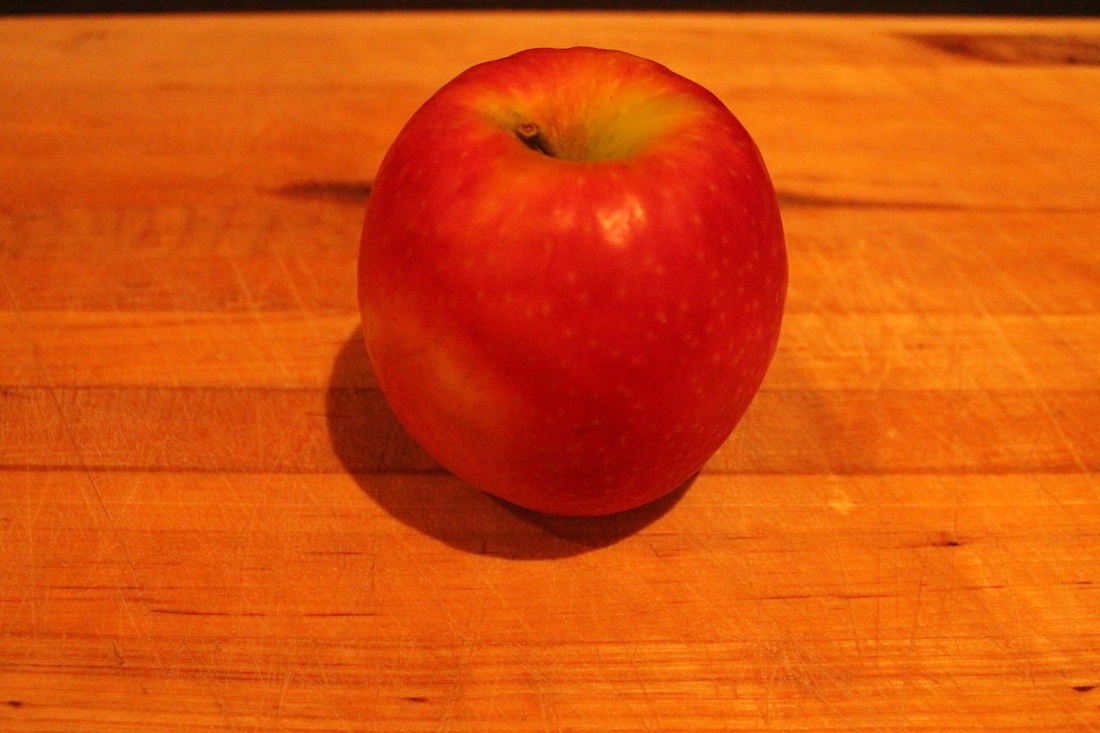
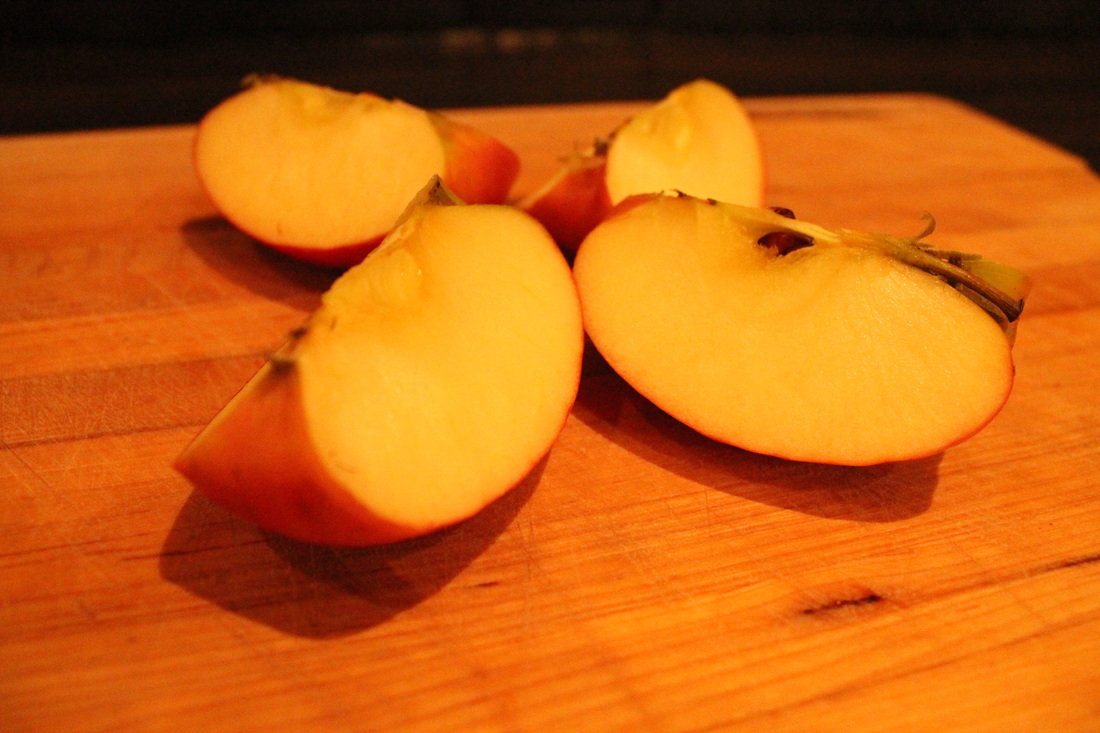
In my response I got a tangerine, an apple and some beans. I separated each one in different ways, for the tangerine I peeled away the excess skin and split it in half. For the beans I diced them up together with a kitchen knife. For the apple I sliced it in half and then half again, I then played the quarters out, corner to corner.
|
|
|
Task 2: Portraits
|
|
The eye-opening series of photographs created by Ulric Collette features family members' faces spliced together, with startling results.
|
My Response
|
|
In my response I went on the Fortismere art departments website and watched a tutorial which I used as guidelines on photoshop to create this outcome.
|


Task 3: Chemical Reactions
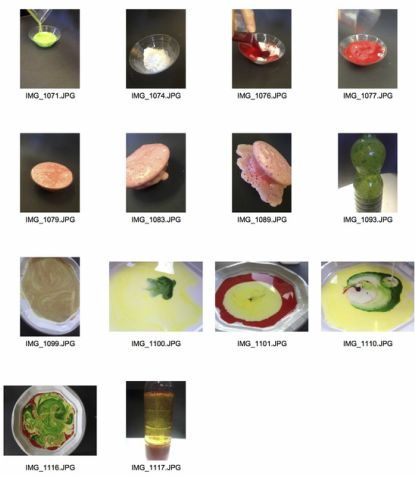
Bubbling Lava Lamp
Materials: Clean plastic soda bottle Soda bottle top Vegetable oil (the cheaper the better) food colouring Alka Seltzer table Water
|
Magic potion
Materials: Bowl 2 Tbsp vinegar 1 Tbsp baking soda Food colouring Put 2 Tbsp vinegar in the bowl Add food colouring to the vinegar. Add 1 Tbsp baking soda (all at once) Record what happens What Happened: The bubbles that form are carbon dioxide gas. A chemical reaction occurs between the vinegar (an acid) and the baking soda (a base). The bubbles that form are carbon dioxide gas. A chemical reaction occurs between the vinegar (an acid) and the baking soda (a base). |
Contact sheet for first set of observations

|
For this set of observations I went between South bank and London Bridge in central London to take my pictures. I focused my pictures on individual objects and pairs.
What went well: In this set of observations I think the major variety of pictures went well as it lets me explore the different types and edits of these pictures. Even better if: It would have been better if I had a clearer understanding of the topics I would be following later on, so I could of specified the images captured. What's next? Next I will edit my pictures on photoshop and text edit to create a very different effect. |
Strand One
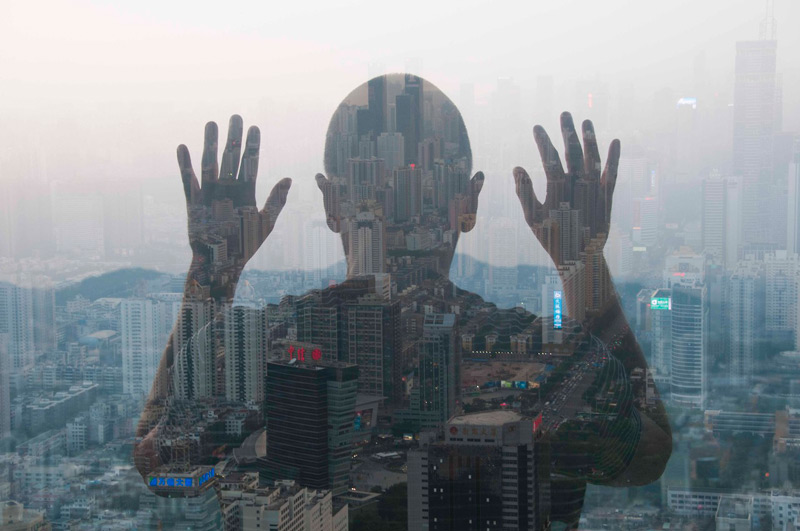
Jasper James:
|
Jasper James is a Beijing based photographer who was inspired by his travels through China, Which lead him to creating a series called City silhouettes. In the series the city is visible through a persons silhouette.
|
My Response


These pictures were not that successful as I didn't know the exact technique that Jasper James uses and therefore did not create the same effect. Things which went well are that all the faces are roughly the same size. It would have been better if I could have made the outline of the portrait clear but not as visible of a face but more of the building behind it.
Strand Two
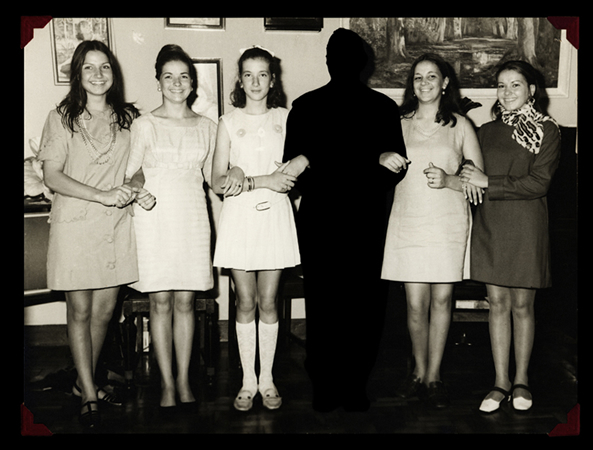
Ludmila Steckelberg:
|
This picture strongly represents the apart side of the topic. As one person from the picture has been completely turned back creating a type of silhouette. The person creates an anomaly in the picture as there should be a person linking arms joining everyone together but splits the group into two.
|
My response
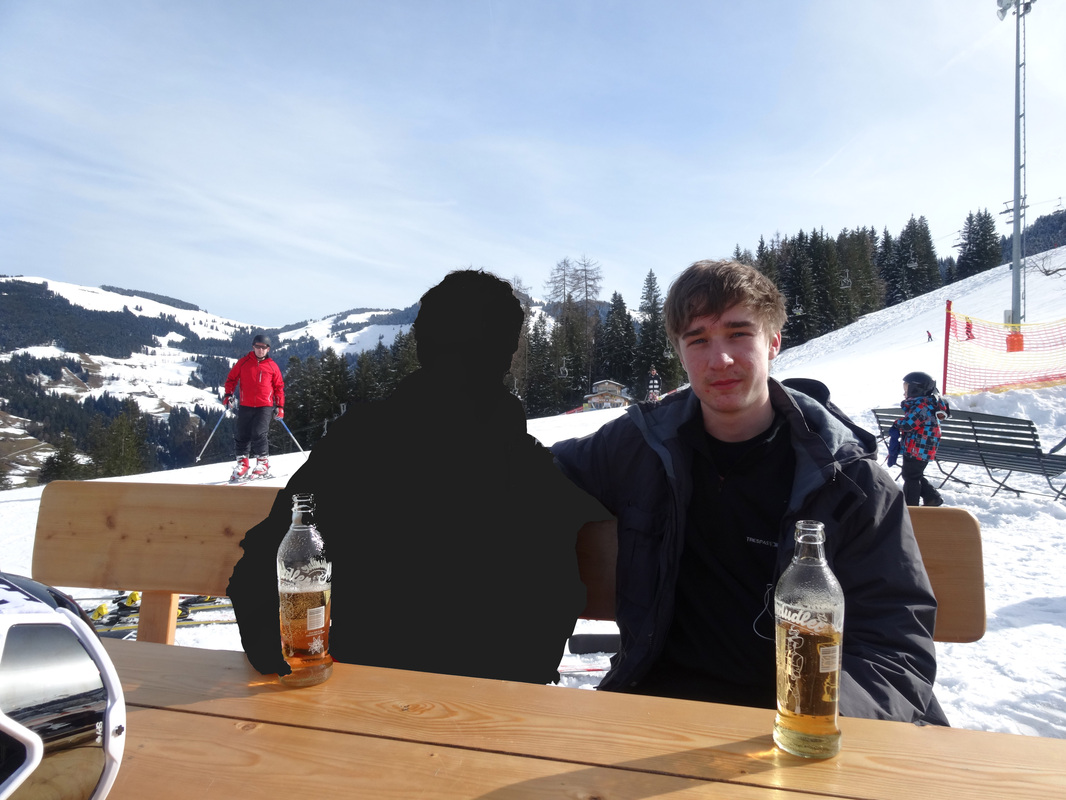
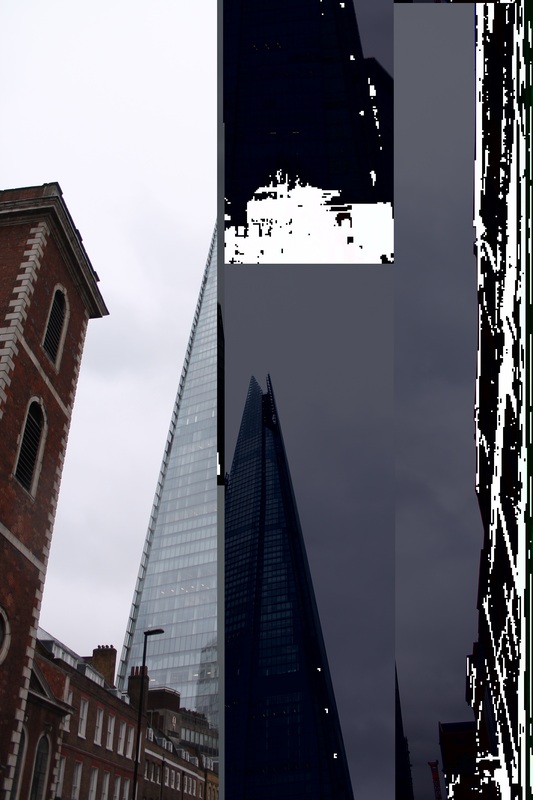
In this edit I changed the photographers point of colouring one person in, in a group. Instead I colored in the main focus of the picture. In this case it was the Shard.

|
In my response my brother and I were sitting on a bench. My brother on the right and me, the black silhouette. To achieve this edit on photoshop I originally tried to select myself with the quick selection tool then fill myself in with black using the fill bucket. ```it became quickly apparent that this couldn't be an option as the fill tool only fills a tiny selection which doesn't completely work. So instead I used the brush tool and just coloured myself in which has worked very well.

In this image I decided not to blackout the whole of one object. But instead i decided to black out a face of a building which connects the sides beside it together.
|
I think these are very successful as it is very clear and obvious for the coloured in parts in the picture. It would have been better if the magic tool was more precise and accurate as it wasn't working to well. This resulted in me having to just colour it in with the painting tool because the fill tool wasn't working. It would have been better if I put more time into each picture so they are much more precise.
Strand Three
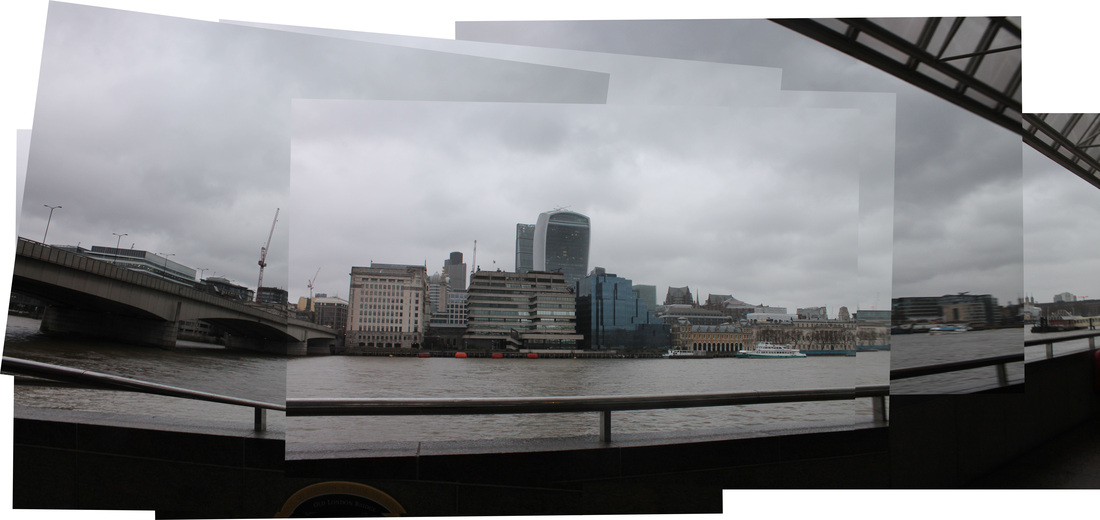
Krista Wortendyke
|
This picture is made up of over 20 images. Yet all of the images align perfectly to create one final picture with clear borders and visibility of of what has been photographed.
|
My Response
|
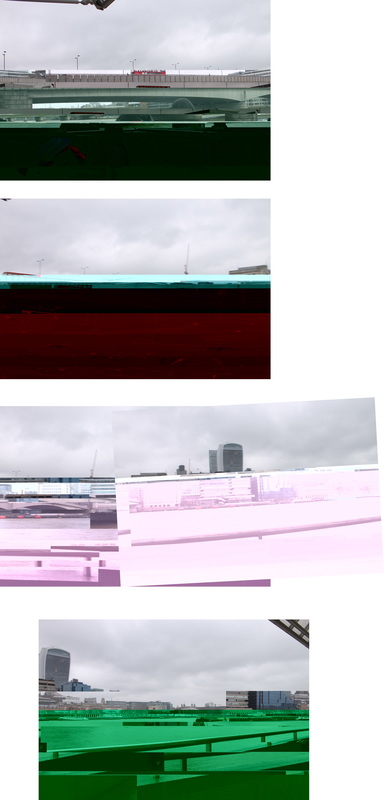
In my response I travelled to London Bridge in Central London and created a joiner of the buildings on the side of south bank but further up. To create this image you click on file, automate, photomerge. You then click on collage which will be on a tab which pops up, after that you select and add your photos. Once you have imported your photos you click ok and photoshop merges the picture today to create a joiner.
|
|
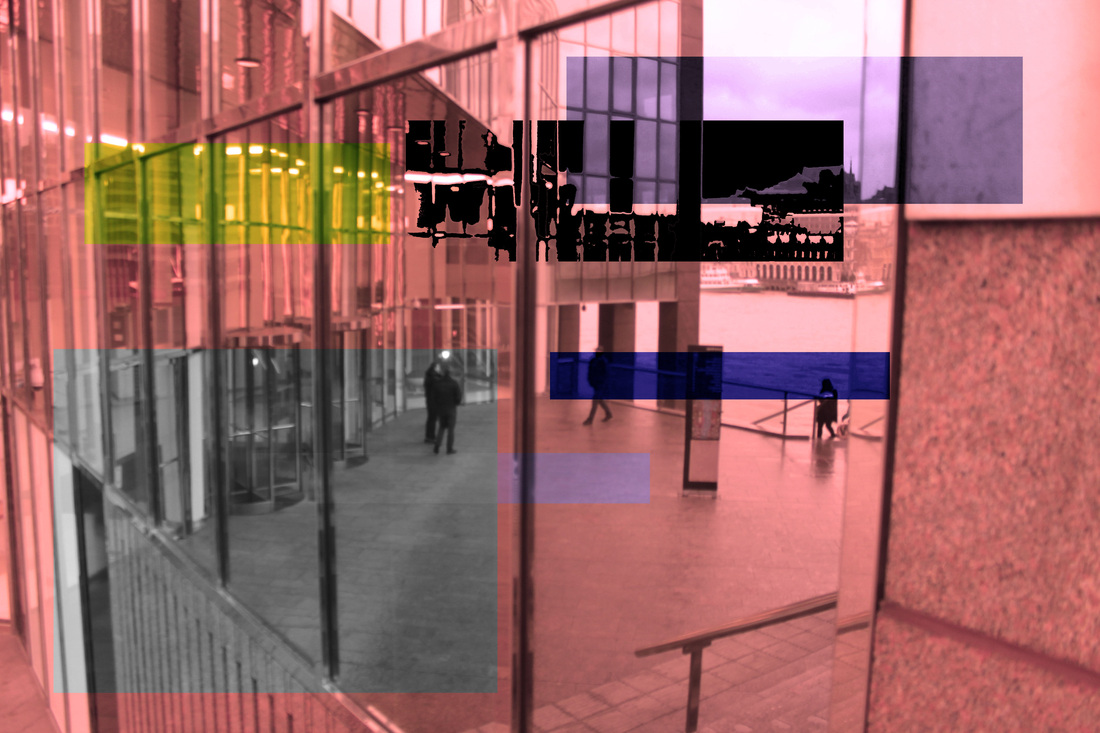
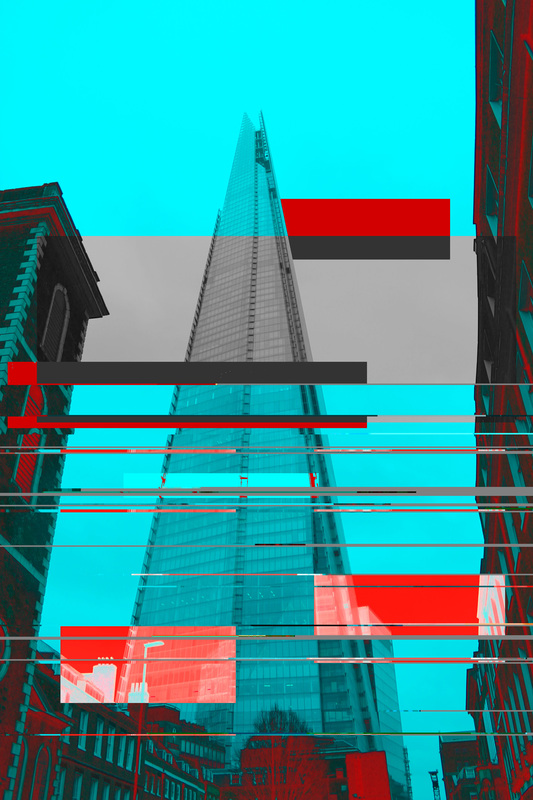
In this image I originally had a colour change effect as the back ground, the colour was a mix of red and opec black. I then selected rectangles and squares with the cut and copy tool , then I choose a different colour or effect and layered some onto of others to create this.

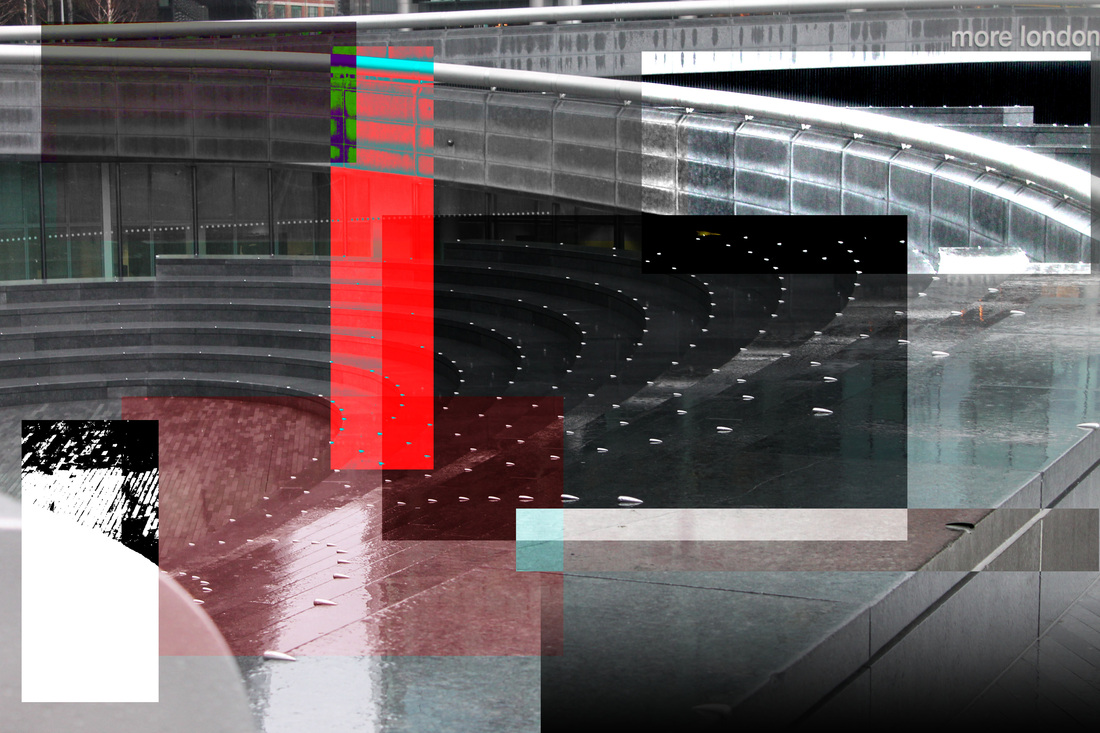
In this picture I decided to experiment in some places with the gradient, contrast, exposure, colour balance and more. I combined each different one into one picture with some overlapping others.
|
In this image I decided to not make a joiner but to select parts of the image and change the contrast of the background colour to create a different affect. This means that it hasn't got the the effect of the images not being connected in the joiner.
|
Kazuya Tsuji
|
|
Born in Japan, living and working in London, Kazuya Tsuji is a mixed media artist dedicated to transforming found imagery into the miraculous, the halerious, the grotesque and the wonderful. Working in a variety of mediums, which includes found objects, marble and drawing pins, Kazuya Tsuji creates 3d and 2d collage, finding unexpected relationships between objects.
Collectable and unique, Kazuya Tsuji has won sculpture commissions and scholarships from both GALERIE8 Projects and The University of the Arts London. Alongside this Kazuya has displayed his work in solo and group shows for the Saatchi Gallery and WW Gallery, around the UK, in Europe and in Japan. |
My Response
|
In my response i decided to change the colours of the drawing pins used. I changed the colour for each new stripe across my face. As a result of this I decided i did not like my response and i am not going to pursue it further.
|

|
Glitching
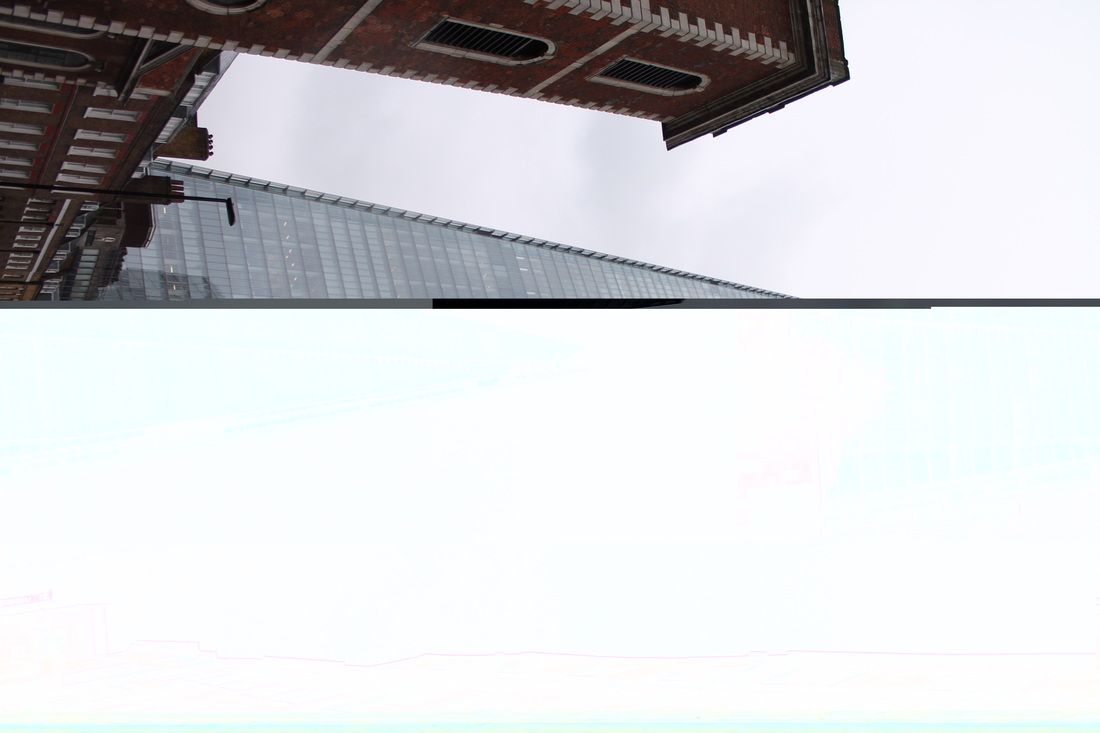
In this image I decided not to keep the glitching only on buildings but I decided to switch it up and start doing portraits of people. This is different from the other glitches i have done as it is immediately clear where and what is either out of place or out of proportion.
In this attempt to make a joiner I opened each of the pictures going to be used in the joiner separately in text edit. I then glitched each photo individually and with these pictures I attempted to make a joiner. As you can see this did not work as it could recognise the pictures and this was the outcome.
|
STEP 1: Select an Image Select any image to glitch, any format will work but the results could be different so we recommend you try it out with different file formats: TIFF, JPG, RAW, BMP… STEP 2: Duplicate the image Now listen up! It’s very important to duplicate the images you want to glitch because you can destroy them forever. We don’t want to feel responsible for that! STEP 3: Open “Text Edit” Open the “Text Edit” application and open the image you want to glitch in it. You should see a whole bunch of weird text lines. STEP 4: Destroy the code! Now this is the fun part! We hate these kinds of boring codes so it should be a pleasure to destroy them! But be careful with the first 1/4 part of the code, don’t touch it or the image will be damaged forever. So go for the last 3/4 of the code, add new random text, copy a line or two of code and paste it somewhere else in the text file. Or you can also use the “Find And Replace” tool to replace a lot of glyphs in a fast way. Make what you want, but above all – destroy the code! STEP 5: Save it Now you have to save the code, but don’t click “save as”, click “save” (CMND+ S) or the glitch will not run. STEP 6: Glitch art! Now open the glitched image and see what you’ve created! Remember that you can edit it with “Text Edit” as many times as you want, until you like the result. 
With this edit I decided to join the two different photo edit types of Glitching and Krista Wortendyke to give this final outcome.
|
In the exam I will be Duplicating joiners and glitching each one individually, I will then layer each image on top of each other on photoshop. I will the cut parts from each image on each layer to create a more glitched effect.
